Motor Rewind Basics
Electric motors are essential for keeping operations running smoothly, but like all equipment, they wear out over time. The good news? Many electric motors can be restored through a rewind, extending their lifespan and saving you the cost of a full replacement. An electric motor rewind refurbishes the motor to near-new condition, allowing it to get back to work. So, what does the rewind process involve? Let’s break it down step by step.
Can Any Motor Be Rewound?
In many cases, yes! However, the root cause of the failure plays a big role in determining whether a motor is a good candidate for rewinding. One of the most critical components to evaluate is the stator core.
The stator core consists of stacked iron laminations and copper windings, all insulated to maintain efficiency. If the insulation is in good condition, rewinding is usually possible. But if the stator core has suffered extreme heat damage or failure due to a bearing issue, a rewind may not be enough to restore functionality. Common motor failures that can be fixed with a rewind include:
-
Overloading
-
Faulty motor controls or external electrical issues
-
Moisture damage
The Rewinding Process
Preliminary Inspection
Before any rewinding begins, it’s crucial to assess the extent of the damage. EASA-certified repair shops follow strict inspection guidelines to ensure the motor can be restored without losing efficiency.
Information Gathering
First, technicians collect details from the motor’s nameplate, including voltage, horsepower, and winding configurations. Then, they conduct a detailed inspection, checking for wear, discoloration, or missing parts. Talking with the customer is also key—understanding how the motor was used and when issues started helps pinpoint the cause of failure.
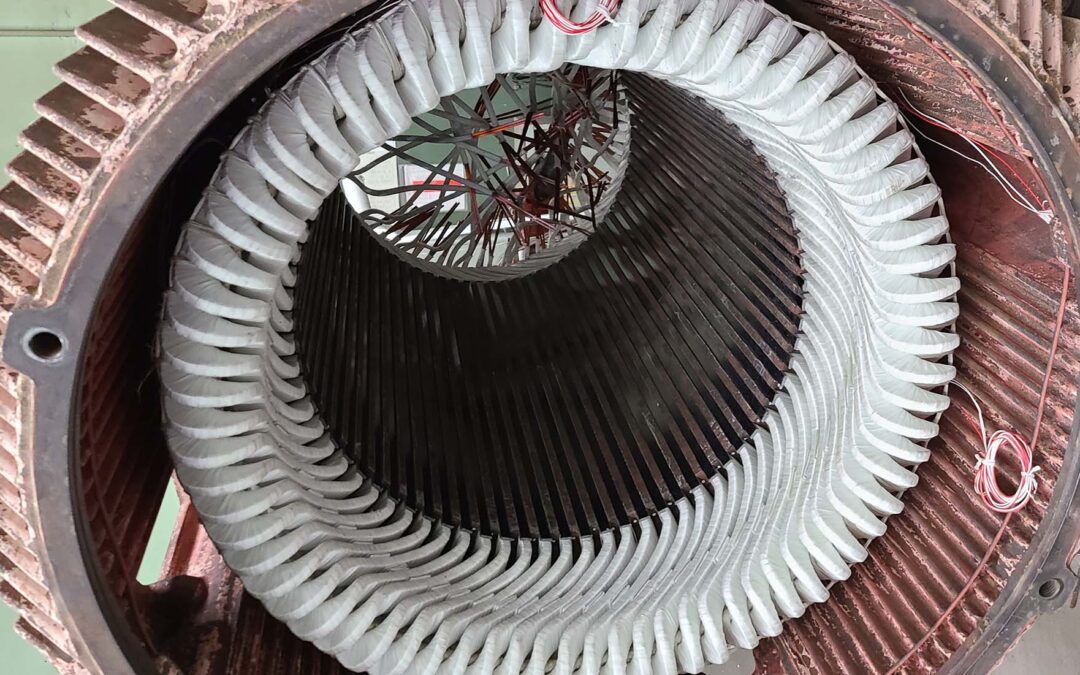
Checking the Laminations
When it comes to laminations, removing them entirely should be avoided. However, if small sections are missing, they can often be restacked. Any core material loss should not exceed 2% of the core length or 10% of the number of teeth to maintain motor efficiency.
Removing the Old Windings
To install new windings, the old ones need to be removed first. For smaller motors, this is done manually by skilled technicians. Larger motors require more precision—often, the stator is heated to around 700°F for about 10 hours, turning the insulation to ash for easy removal.
Cleaning the Stator Core
Once the windings are removed, the stator core must be thoroughly cleaned to ensure a smooth installation. Recommended cleaning methods include:
-
Careful scraping
-
High-pressure washing
-
Mild abrasive blasting
-
Wire brushing
A gentle approach is necessary to prevent damage to the stator laminations, which could lead to short circuits.
Inspecting the Core
Before proceeding with rewinding, technicians check the motor’s “vital signs.” This includes measuring watts loss and temperature rise to ensure they fall within acceptable limits. If there’s excessive heat damage or mechanical wear, the motor may not be repairable.
Creating the New Windings
New windings are prepared either by hand or using a coil winding machine. To ensure proper function, key factors like wire size, number of turns per coil, and winding connections must match the original specifications. Sometimes, technicians may use an improved winding pattern to enhance motor efficiency and reduce energy losses.
Installing the New Windings
After the new windings are made, they’re carefully inserted into the stator core. Coils and leads must be connected to replicate the original wiring. Before moving forward, technicians conduct thorough testing to confirm everything is correctly installed. Common tests include:
-
Winding resistance test
-
Surge test
-
Hipot test
-
Polarization index test
-
Megger test
VPI and Baking
Once testing is complete, the motor undergoes a Vacuum Pressure Impregnation (VPI) process. This step ensures the windings are fully insulated and resistant to moisture. Afterward, the motor is baked at around 300°F for at least four hours to set the insulation properly.
Reassembly and Final Checks
With the motor rewound and tested, it’s time for reassembly. Bearings are installed, lubricated, and the fan is properly positioned to ensure smooth operation. It’s also important to handle the rotor and stator air gap carefully—any damage to these surfaces can reduce motor efficiency. Finally, the motor’s exterior is refinished with a fresh coat of paint, ensuring it looks as good as it runs!
Why Choose a Certified Repair Shop?
Not all repair shops follow best practices when it comes to motor rewinding. Choosing an EASA-accredited AR-100 repair facility guarantees that your motor is restored following industry-leading standards. With a professional rewind, you get peace of mind knowing your motor will perform reliably and efficiently.
B+M Industrial is one of less than 160 companies across the world with this accreditation and their decades of experience ensure your electric motor will be rewound correctly. To learn more about how B+M Industrial can help you with your electric motor rewind needs, contact our team of experts today.